Cozy crochet slippers pattern for beginners
Simple ribbed slippers worked completely flat with zero complex shaping. Fold, seam the toe and heel, and fold down the cuff for instant cozy warmth.
By YarnHook
|3 min read
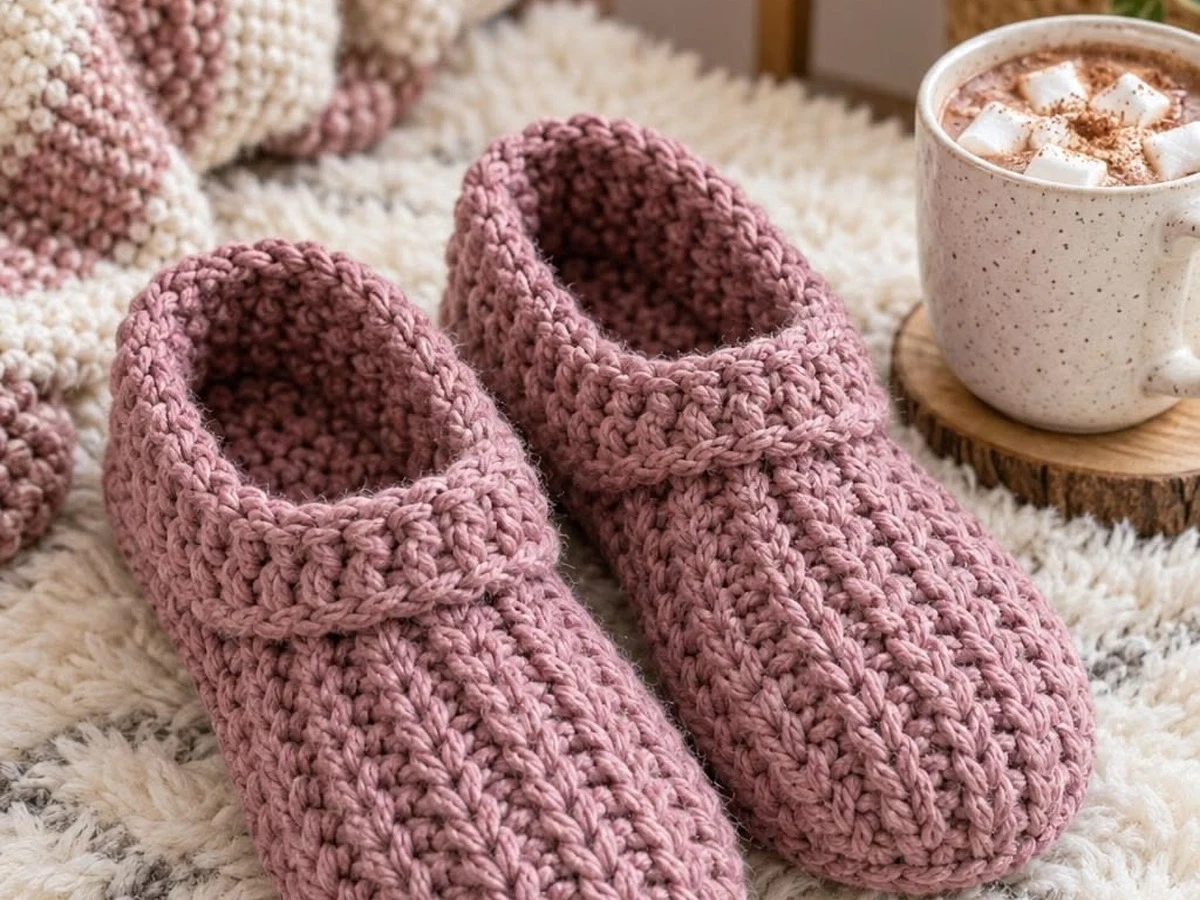
If you've been intimidated by footwear patterns that require complex heel turns or working around rigid soles, this cozy ribbed slipper pattern is the easiest project to start with. Each slipper is crocheted as a simple, stretchy ribbed rectangle worked flat with zero decreases or shaping.
Once your rectangle is complete, two simple seams transform it into a snug, foot-hugging slipper with a fold-down cuff that looks like chunky hand-knit ribbing.
Sizing Chart
The ribbing stretches generously around the foot. Choose your size based on standard shoe size:
| Size | US Women's Shoe | Rectangle Width | Rectangle Length | Starting Chain |
|---|---|---|---|---|
| Small | 5–6 (EU 35–36) | 7.5 in (19 cm) | 8 in (20 cm) | Ch 26 |
| Medium | 7–8 (EU 37–39) | 8.5 in (21.5 cm) | 9 in (23 cm) | Ch 30 |
| Large | 9–10 (EU 40–42) | 9.5 in (24 cm) | 10 in (25.5 cm) | Ch 34 |
| XL | 11+ (EU 43+) | 10 in (25.5 cm) | 11 in (28 cm) | Ch 38 |
Materials
- Bulky weight (#5) yarn: approx. 180 (200, 220, 240) yd in Dusty Rose / Mauve (or hold two strands of worsted #4 yarn together)
- Crochet hook: 6 mm (J-10)
- Large-eye yarn needle & scissors
- Optional non-slip grip: Clear puff paint or liquid latex for the soles
Gauge & Stitches
- Gauge: 11 hdc and 9 rows = 4 in (10 cm) worked in back loop only (BLO).
- hdc: half double crochet
- BLO: back loop only (insert hook only under the back strand of the V)
- sl st: slip stitch
Slipper Pattern (Make 2)
Worked flat in back-and-forth rows.
Foundation:
Ch 26 (30, 34, 38) loosely.
Body Rows (Ribbed Texture):
- Row 1: Hdc in the 2nd ch from hook and in each ch across. (25, 29, 33, 37 sts)
- Row 2: Ch 1 (does not count as a stitch here and throughout), turn. Hdc in the BLO of each st across.
- Rows 3–20 (22, 24, 26): Repeat Row 2 until the piece measures the recommended width for your size when slightly stretched.
Do not fasten off on the second slipper; leave an 18-inch (45 cm) tail for seaming.
Assembly (Folding & Seaming)
Gather the Toe:
- Thread your yarn needle with the long tail.
- Weave the needle in and out through the edge of the short end (the toe end).
- Pull the yarn firmly to gather the end tightly into a rounded toe closed circle. Knot securely.
Top Foot Seam:
- With the slipper right side out, whip stitch or mattress stitch the edges together from the toe toward the ankle for about 3.5 to 4 inches (halfway up the foot).
- Fasten off and leave the remaining upper opening unseamed so your foot can slip in easily.
Heel Seam:
- Fold the back short edge in half.
- Using a new strand of yarn, sew the vertical heel seam from bottom to top.
Turned-Down Cuff:
- Fold the top 1.5 inches (4 cm) of the ankle collar downward to create the thick, plush rolled cuff.
Care & Washing
Machine wash in cold water on gentle cycle inside a pillowcase or laundry bag. Lay flat to dry on a towel to maintain the stretchy ribbed elasticity.
Questions about this pattern
Are these slippers worked flat or in the round?
They are worked 100% flat as simple rectangles! You crochet back-and-forth rows through the back loop to create stretchy ribbing, then fold and sew two quick seams at the toe and heel.
How do I make the slipper soles non-slip?
Apply small dots or wavy lines of liquid silicone, puff fabric paint (dimensional paint), or natural liquid latex along the bottom sole. Allow it to dry completely for 24 hours to create washable non-slip traction.
What yarn makes the warmest crochet slippers?
A wool-blend bulky weight yarn (#5) or holding two strands of worsted acrylic/wool together gives extra cushion underfoot and keeps toes toasty warm on cold tile and hardwood floors.
YarnHook
Free crochet patterns and tutorials
YarnHook publishes free crochet patterns and tutorials in plain language, using US crochet terms.