Minimalist Textured Crochet Beanie Pattern — Fitted Neutral Dome Cap
Worked top-down in seamless continuous rounds with back-loop single crochet. A modern, minimalist unisex dome cap with crisp horizontal texture.
By YarnHook
|4 min read
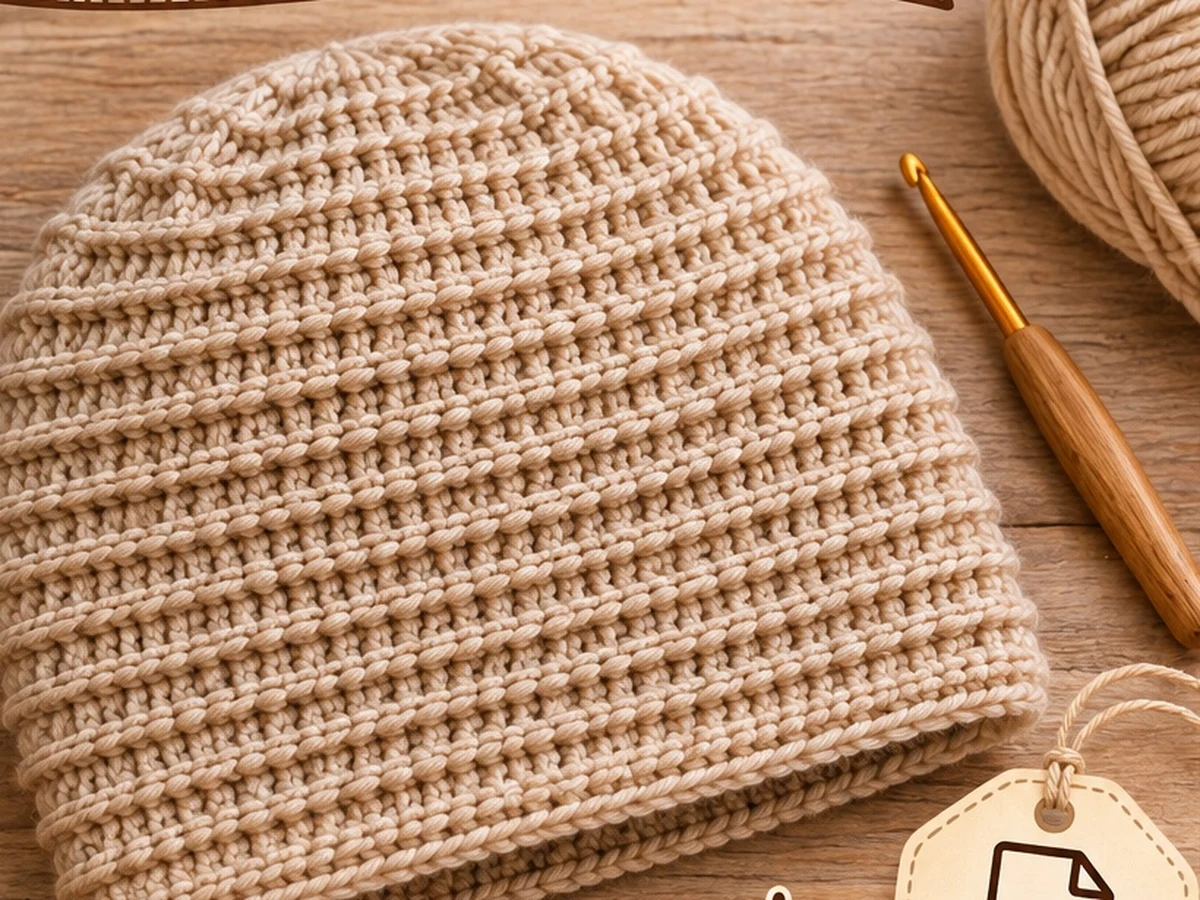
Clean lines, dense textile texture, and an understated silhouette define the modern minimalist dome beanie. Unlike loose slouchy hats or chunky pom-pom caps, this design fits comfortably close to the skull with a tailored, rounded profile.
By working in the back loop only (BLO) in continuous top-down rounds, each stitch pushes the unworked front loop forward, producing crisp, tactile horizontal ridges that look like fine architectural knitwear.
Materials & Sizing
- Yarn: Worsted weight (#4) wool, alpaca, or premium acrylic blend in a neutral earth tone (oatmeal heather, camel, slate, or stone). You will need approximately 190 to 220 yd (175–200 m).
- Hook: 5.5 mm (US I-9) crochet hook (or size needed to obtain gauge).
- Notions: 1 locking stitch marker, yarn needle, measuring tape, sharp scissors.
Gauge Check
In back-loop single crochet (BLO sc):
- 14 sts and 15 rounds = 4 × 4 in (10 × 10 cm)
Taking 5 minutes to measure your flat crown circle at Round 8 guarantees your finished hat will fit effortlessly without pinching.
Stitch Abbreviations (US Terms)
- MR: magic ring (or ch 3, sl st to join)
- sc: single crochet
- inc: 2 sc worked into the same stitch
- BLO: back loop only (insert hook under only the rear loop furthest away from you)
- sl st: slip stitch
- st(s): stitch(es)
Pattern Notes
- Continuous Spiral: Do not join rounds with a slip stitch or chain 1 at the end of rounds unless explicitly instructed. Place a locking stitch marker in the first stitch of each round and move it up as you work.
- Back Loop Texture: Starting from Round 2 through Round 26, work all single crochet stitches strictly into the back loop only (BLO).
- Crown Measurement: Stop and measure the flat diameter of your circle after Round 8. It should measure 6.25–6.5 in (16 cm) for standard adult sizing.
Step-by-Step Instructions
Part 1: The Tailored Crown (Increases)
Begin with a magic ring.
Round 1: Work 6 sc into the magic ring. Pull tail snugly to close ring. Do not join. (6 sc)
Round 2: Inc in the BLO of each st around. (12 sc)
Round 3: (Sc in BLO of next st, inc in BLO of next st) around. (18 sc)
Round 4: (Sc in BLO of next 2 sts, inc in BLO of next st) around. (24 sc)
Round 5: (Sc in BLO of next 3 sts, inc in BLO of next st) around. (30 sc)
Round 6: (Sc in BLO of next 4 sts, inc in BLO of next st) around. (36 sc)
Check: Crown diameter is approximately 4.5 in (11.5 cm).
Round 7: (Sc in BLO of next 5 sts, inc in BLO of next st) around. (42 sc)
Round 8: (Sc in BLO of next 6 sts, inc in BLO of next st) around. (48 sc)
Round 9: (Sc in BLO of next 7 sts, inc in BLO of next st) around. (54 sc)
Round 10: (Sc in BLO of next 8 sts, inc in BLO of next st) around. (60 sc)
Part 2: The Body (Straight Textured Sides)
Now that the crown diameter is established, stop increasing. Working even rounds causes the piece to curve downward smoothly into a sleek dome.
Rounds 11–26 (16 rounds): Sc in the BLO of each st around. (60 sc per round)
Check: At the end of Round 26, your beanie should measure approximately 7.5 in (19 cm) from the center crown down to the working edge.
Part 3: The Snug Slip-Stitch Brim
To give the beanie a clean, non-rolling lower band that grips comfortably without overstretching, finish with four rounds of relaxed slip stitching.
Round 27: Sc in both loops of each st around. (60 sc)
(Working through both loops creates a solid anchor row between the textured body and the brim).
Rounds 28–30 (3 rounds): Sl st loosely in the BLO of each st around. (60 sl st)
Finishing: Fasten off leaving a 6-inch yarn tail. Thread the tail onto a yarn needle and make an invisible join into the first slip stitch of the final round. Weave in all yarn tails along the inside ridges.
Sizing Chart & Customization
| Size | Head Circumference | Crown Increases (Stop at) | Crown Diameter | Total Height |
|---|---|---|---|---|
| Small / Teen | 19–20 in (48–51 cm) | Round 9 (54 sts) | 5.75 in (14.5 cm) | 7.75 in (19.5 cm) |
| Medium (Unisex Adult) | 21–22 in (53–56 cm) | Round 10 (60 sts) | 6.5 in (16.5 cm) | 8.5 in (21.5 cm) |
| Large / Slouch Option | 23–24 in (58–61 cm) | Round 11 (66 sts) | 7.0 in (18 cm) | 9.0 in (23 cm) |
3 Tips for a High-End Finish
- Steam Block Gently: Hold a garment steamer 2 inches away from the hat while it rests over an inverted bowl or mannequin head. Steam relaxes the fibers and smooths the crown curve.
- Avoid Acrylic Squeak: Opt for a wool blend (like 80% acrylic / 20% wool or 100% merino). The slight fuzz and natural spring of wool give the back-loop ridges a luxurious retail look.
- Seamless Spiral Finish: By stepping down from sc to sl st over the final two rounds, you eliminate the noticeable stair-step edge common in spiral crochet projects.
Questions about this pattern
Why work this beanie top-down instead of side-to-side flat?
Top-down construction allows you to try the hat on your head as you work, guaranteeing a custom, tailored fit. Working in continuous spiral rounds also eliminates bulky seaming, giving you a completely seamless 360-degree dome cap with uniform horizontal ridges.
How do I prevent the top of the beanie from forming a pointed cone?
A pointed cone happens when crown increase rounds are too tight or spaced too far apart. Keep your tension relaxed on Rounds 1 through 6, and make sure your flat crown circle measures a true 6.25 to 6.5 inches across before working even rounds.
Can I adapt this pattern to have a fold-up brim?
Yes. The base pattern finishes as a modern, close-fitting skull dome cap (8.5 in deep). To add a classic 2-inch fold-over cuff, simply continue working even rounds for an extra 10 to 12 rounds before fastening off.
YarnHook
Free crochet patterns and tutorials
YarnHook publishes free crochet patterns and tutorials in plain language, using US crochet terms.